Drywall Installation Expert Tips and Tricks
When it comes to finishing a room or renovating a space, drywall installation is a critical step that can greatly affect the final appearance of your walls and ceilings. Proper drywall installation ensures smooth, durable surfaces that are ready for painting or finishing. Here are some expert tips and tricks to help you achieve a professional-grade drywall installation.
1. Gather the Right Tools and Materials
Before starting your drywall installation, make sure you have all the necessary tools and materials. Here’s a basic list to get you started:
- Drywall sheets (typically 4x8 feet)
- Drywall screws or nails
- Drill or screwdriver
- Drywall saw or utility knife
- T-square
- Tape measure
- Joint compound
- Drywall tape
- Sanding sponge or sandpaper
- Corner beads
- Step ladder or drywall lift
2. Plan and Measure Carefully
Accurate measurements are crucial for a successful drywall installation. Measure the height and width of your walls and ceilings to determine how many sheets of drywall you’ll need. Mark the stud locations on the ceiling and floor to guide you during installation.
Tips for Measuring:
- Always measure twice to ensure accuracy.
- Use a T-square to mark straight lines for cuts.
- Plan your layout to minimize the number of seams and cuts.
3. Cut Drywall Correctly
Cutting drywall properly is essential to ensure it fits well and reduces waste. Here’s how to do it:
- Use a utility knife to score the paper face along the cutting line.
- Snap the drywall sheet along the scored line.
- Cut through the paper backing with your utility knife to complete the cut.
Tips for Cutting:
- Score the drywall on the smooth side first for a cleaner break.
- Use a drywall saw for more intricate cuts around fixtures and outlets.
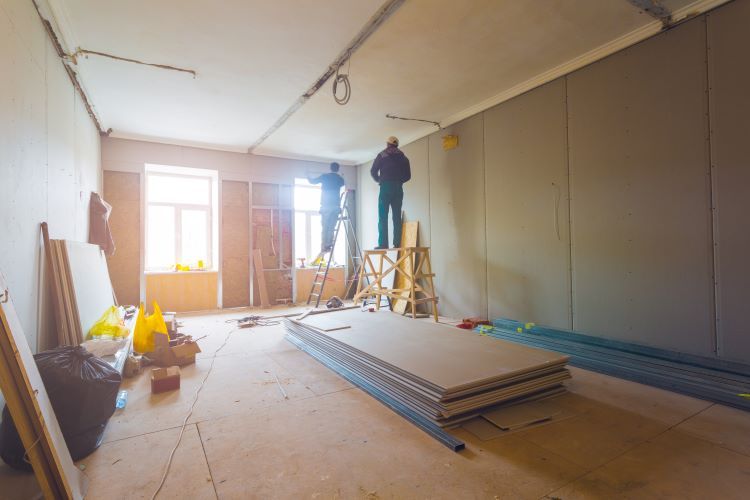
4. Install Drywall Panels Properly
When hanging drywall, always start with the ceiling before moving to the walls. This provides better support and ensures a seamless finish.
Tips for Hanging Drywall:
- Position the drywall sheet perpendicular to the studs.
- Use drywall screws or nails, placing them every 12 to 16 inches along the studs.
- Keep screws or nails slightly recessed without breaking the paper surface.
- Use a drywall lift or get help to handle ceiling panels safely.
5. Tape and Mud Like a Pro
Taping and applying joint compound (mud) are crucial for hiding seams and creating a smooth surface.
Tips for Taping and Mudding:
- Apply a thin layer of joint compound over seams and corners.
- Place drywall tape over the compound and press it firmly.
- Smooth out any bubbles or wrinkles with a drywall knife.
- Apply several thin layers of joint compound, feathering out each layer to blend with the wall surface.
- Sand between layers for a smooth finish.
6. Sand Smoothly and Safely
Sanding is the final step to achieve a smooth surface ready for painting or finishing.
Tips for Sanding:
- Use a fine-grit sandpaper or sanding sponge.
- Sand in a circular motion to avoid gouges.
- Wear a dust mask and goggles to protect yourself from dust.
- Use a vacuum or damp cloth to remove dust before painting.
7. Handle Corners and Edges with Care
Corners and edges can be tricky, but with the right techniques, you can achieve crisp, clean lines.
Tips for Corners and Edges:
- Use corner beads to protect and reinforce external corners.
- Apply joint compound over the corner beads and feather it out.
- For inside corners, use drywall tape and apply joint compound carefully.
8. Inspect and Touch Up
Before declaring the job complete, inspect your work for any imperfections.
Tips for Inspection:
- Use a bright light to spot any bumps, dents, or unsmooth areas.
- Touch up any flaws with additional joint compound and sanding as needed.
- Ensure all screws or nails are properly recessed and covered with compound.
Conclusion
Drywall installation may seem daunting, but with the right tools, techniques, and a bit of patience, you can achieve professional-quality results. Whether you’re renovating a single room or finishing an entire basement, these expert tips and tricks will help you create smooth, flawless walls and ceilings.
For those who prefer to leave it to the professionals, Windsor Drywallers is here to help. Our experienced team ensures top-notch drywall installation, providing a perfect finish for your home or office. Contact us today for a consultation and let us bring our expertise to your next project.
You might also like


