Welcome To Our Blog!
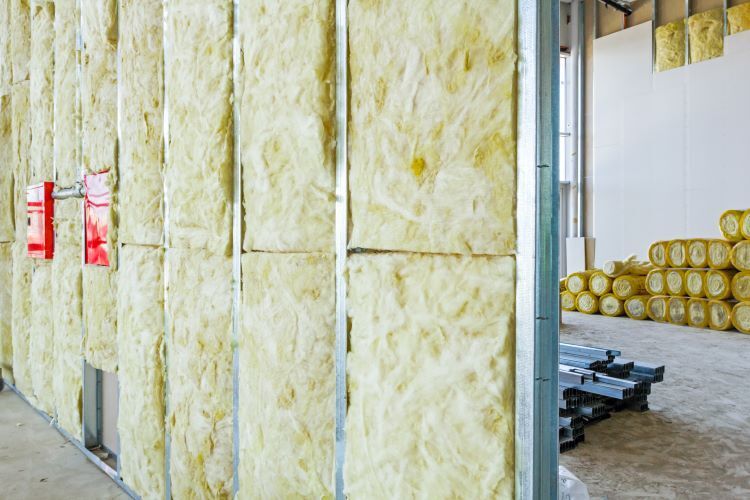
Proper insulation is essential for a comfortable and energy-efficient home, especially in Windsor, Ontario, where temperature fluctuations can be significant. While drywall insulation is designed to last for many years, there comes a point when an upgrade becomes necessary. Knowing when to upgrade your drywall insulation can save you money, improve indoor comfort, and even enhance your home's value. Signs It's Time to Upgrade Your Drywall Insulation 1. Increased Energy Bills If your heating or cooling costs have been steadily rising without significant changes in usage, your insulation may no longer be performing efficiently. Poor insulation allows heat to escape in the winter and seep in during the summer, forcing your HVAC system to work harder. 2. Uncomfortable Temperature Fluctuations Uneven temperatures between rooms or floors often indicate gaps or deteriorating insulation within your walls. Upgrading your drywall insulation can help maintain a consistent temperature throughout your home. 3. Drafts or Cold Spots Feeling drafts near walls or cold spots in certain areas? These are classic signs of insufficient or aging insulation, which can no longer create a proper thermal barrier. 4. Visible Signs of Damage If you notice water stains, mold, or mildew on your walls, your insulation could be compromised. Moisture not only damages insulation but can also lead to health hazards like mold growth. 5. Home Renovations Any time you’re remodeling or updating parts of your home, it’s worth assessing the condition of your drywall insulation. Renovations provide a great opportunity to upgrade to modern, energy-efficient materials. 6. Older Home Construction Homes built before the 1980s often have outdated insulation materials that don’t meet today’s energy standards. If your home is older, consider upgrading to newer, more efficient insulation options. Benefits of Upgrading Drywall Insulation 1. Improved Energy Efficiency Modern insulation materials are designed to provide superior thermal performance, reducing heat loss and lowering energy bills. 2. Enhanced Comfort With upgraded insulation, your home will maintain a more consistent temperature, eliminating hot or cold spots. 3. Increased Property Value Energy-efficient homes are highly attractive to potential buyers. Upgraded insulation can be a selling point, especially in Windsor's competitive real estate market. 4. Better Soundproofing High-quality drywall insulation doesn’t just regulate temperature—it also reduces noise transfer, making your home quieter and more serene. 5. Long-Term Savings While there’s an upfront cost to upgrading, improved energy efficiency translates to significant savings over time on utility bills. Types of Drywall Insulation to Consider When upgrading your insulation, you’ll encounter several options, each with unique benefits: 1. Fiberglass Insulation Cost-effective and widely used. Provides excellent thermal resistance. Often available in batts or loose-fill. 2. Spray Foam Insulation Expands to fill gaps and cracks. Offers superior air sealing and thermal performance. Ideal for hard-to-reach areas. 3. Mineral Wool Insulation Fire-resistant and excellent for soundproofing. Durable and water-resistant, making it great for moisture-prone areas. 4. Rigid Foam Boards High thermal resistance in a compact form. Useful for exterior walls or specific problem areas. When to Call a Professional While small upgrades like sealing gaps with spray foam can be DIY projects, replacing or upgrading drywall insulation is best left to professionals. A certified insulation contractor, like Windsor Drywallers , can assess your current insulation, recommend the best materials, and ensure proper installation. The Process of Upgrading Drywall Insulation Assessment A thorough inspection of your current insulation to identify problem areas and determine the best upgrade options. Removal If your existing insulation is damaged or outdated, it will be safely removed to prevent contamination or further damage. Installation New insulation is installed with precision, ensuring full coverage and optimal thermal performance. Drywall Replacement Once the insulation is upgraded, new drywall is installed and finished seamlessly, restoring your walls to their original appearance. Why Choose Windsor Drywallers? At Windsor Drywallers, we specialize in drywall and insulation services tailored to the unique needs of Windsor homeowners. With years of experience and a commitment to quality, we ensure that your insulation upgrade is handled efficiently and professionally. Whether you’re battling high energy bills or preparing for a renovation, we’re here to help. Contact us today for an inspection and discover how upgraded insulation can transform your home! Conclusion Upgrading your drywall insulation is more than just a maintenance task—it’s an investment in your home’s comfort, efficiency, and value. If you’re noticing signs of wear or preparing for a renovation, now is the time to take action. Trust Windsor Drywallers to deliver the expertise and quality you deserve.
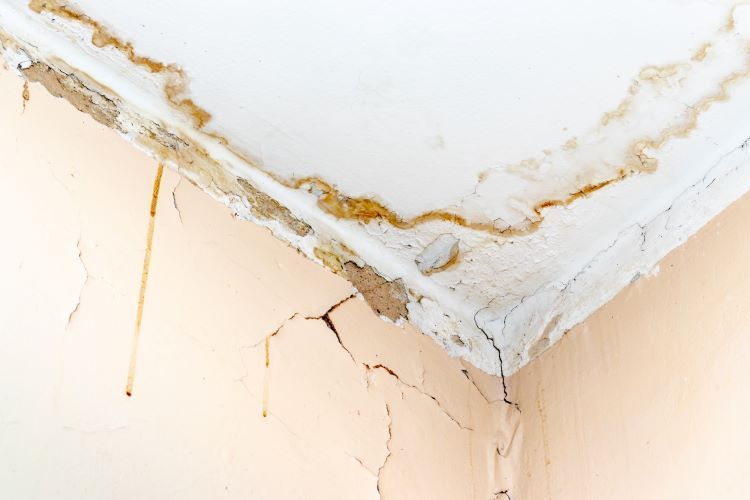
Water damage is one of the most common and destructive issues homeowners face. In Windsor, Ontario, the seasonal weather changes and occasional heavy rainfall make homes particularly vulnerable. When water seeps into drywall and ceilings, it can cause severe structural and aesthetic problems. At Windsor Drywallers , we understand the importance of addressing water damage quickly and effectively. Here’s what you need to know about how water affects drywall and ceiling integrity and why professional repair is crucial. How Water Damages Drywall and Ceilings Drywall and ceilings are made of materials that are highly absorbent, such as gypsum board and plaster. When exposed to water, they quickly soak it up, leading to: Swelling and Warping Water causes drywall to expand and lose its shape, resulting in unsightly bulges or waves. This compromises the smooth, finished appearance of your walls and ceilings. Sagging Ceilings When water collects in the ceiling, it increases the weight and causes the material to sag or buckle. In severe cases, parts of the ceiling may collapse, posing safety risks. Stains and Discoloration Even minor water exposure can leave dark stains or discoloration on drywall and ceilings, which can ruin your interior aesthetics. Mold and Mildew Growth Damp drywall creates the perfect environment for mold and mildew to thrive. This not only damages your walls but also poses serious health risks, particularly for individuals with respiratory issues. Weakened Structural Integrity Prolonged exposure to water can erode the strength of drywall and ceiling materials, increasing the likelihood of cracks, holes, or further collapse. Common Causes of Water Damage Understanding the root causes of water damage can help homeowners prevent future issues. Common culprits include: Leaky Roofs: Rainwater or snowmelt can seep through damaged roofing materials. Plumbing Issues: Burst pipes, leaking fixtures, or clogged drains can lead to water pooling in walls and ceilings. Flooding: Heavy rains or basement floods can saturate lower walls and migrate upward. HVAC Problems: Poor ventilation or condensation buildup can contribute to moisture damage. Why Prompt Repairs Are Crucial Delaying repairs can exacerbate the damage, leading to: Increased Repair Costs: What begins as a minor repair can escalate into full wall or ceiling replacements. Health Risks: Mold and mildew can spread quickly, leading to more extensive remediation efforts. Compromised Home Value: Damaged drywall and ceilings diminish the appeal and structural reliability of your property. Steps for Repairing Water-Damaged Drywall and Ceilings At Windsor Drywallers, we follow a thorough process to ensure your home is restored to its original condition: Inspection and Assessment We begin by identifying the source of the water damage and assessing the extent of the issue. Drying and Dehumidification Using specialized equipment, we dry the affected areas to prevent further damage and mold growth. Removal of Damaged Material Warped or sagging drywall and ceiling panels are carefully removed and disposed of. Replacement and Patching New drywall or ceiling material is installed, and seams are taped and mudded for a seamless finish. Painting and Finishing Once the area is repaired, we repaint to match the rest of your interior, ensuring a flawless appearance. Preventing Future Water Damage To protect your drywall and ceilings: Address Leaks Promptly: Regularly inspect your roof, plumbing, and HVAC systems for signs of trouble. Improve Drainage: Ensure proper grading around your home and maintain gutters and downspouts. Control Indoor Humidity: Use dehumidifiers and proper ventilation to keep moisture levels in check. Conclusion Water damage to drywall and ceilings can have a significant impact on your home’s safety, aesthetics, and value. Addressing these issues quickly with professional help is essential to prevent long-term problems. At Windsor Drywallers , we specialize in water damage repair and restoration. Our expert team is ready to help you reclaim your space with reliable, high-quality repairs. Contact us today for a free consultation and let us help you restore your home to its best condition!
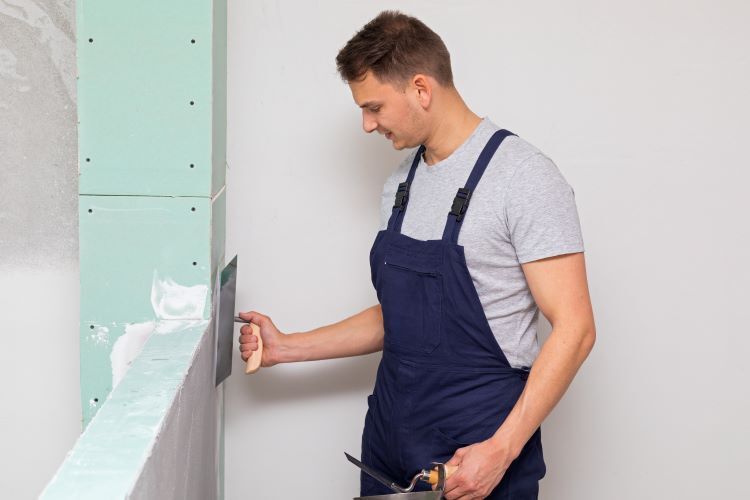
Drywall installation is a critical step in achieving smooth, flawless walls and ceilings in your home. One of the most crucial aspects of this process is applying the right number of coats of joint compound, commonly known as "mud." If you've ever wondered how many coats of mud you need for perfect drywall, you're not alone. In this guide, Windsor Drywallers , your trusted local drywall experts in Windsor, Ontario, break down everything you need to know about achieving that seamless finish. Why Do You Need Multiple Coats of Drywall Mud? Applying drywall mud is essential for hiding seams, screws, and any imperfections on the surface of drywall sheets. The goal is to create a smooth, even surface that’s ready for priming and painting. The process involves multiple coats for several reasons: Filling in Gaps: The first coat is applied to fill in gaps between drywall sheets and cover screws. Building Up Layers: Subsequent coats are used to build up the surface and smooth out uneven areas. Feathering and Smoothing: The final coat ensures that edges are feathered and blended seamlessly into the wall. Skipping coats or applying too few can result in visible seams, dents, or uneven surfaces, which are particularly noticeable after painting. The Ideal Number of Coats: A Step-by-Step Guide The typical number of coats of drywall mud needed for a professional finish is three. Here's a breakdown of each coat and its purpose: 1. The First Coat: Filling and Taping The first coat, also known as the taping coat, is all about covering joints and screws while embedding drywall tape. This step is crucial for strengthening seams and preventing cracks. Materials Needed: All-purpose joint compound and drywall tape (either paper or mesh). Technique: Apply a generous amount of mud over the seams using a 4-6 inch taping knife. Press the drywall tape into the wet mud, smoothing it out to remove air bubbles. Cover the tape with a thin layer of mud to embed it. Apply mud over screw holes to conceal them. Drying Time: Let it dry for 24 hours before moving to the next coat. 2. The Second Coat: Building and Smoothing The second coat is known as the filling coat, which helps to smooth out imperfections and build up the surface. Materials Needed: All-purpose or lightweight joint compound. Technique: Use a wider knife (8-10 inches) to apply mud over the seams, feathering the edges. Smooth out any ridges or bumps from the first coat. Add additional mud to screw holes and corners if needed. Drying Time: Allow 24 hours for drying before proceeding to the final coat. 3. The Third Coat: Finishing and Feathering The third and final coat is the finishing coat. This coat focuses on feathering the edges and achieving a smooth, seamless finish. Materials Needed: Lightweight joint compound for easier sanding. Technique: Use a 12-inch knife to apply a thin layer of mud, feathering out the edges for a smooth transition. Ensure all seams, corners, and screws are completely covered and blended. Lightly sand between coats if necessary to remove any high spots. Drying Time: Let it dry thoroughly (usually 24 hours) before sanding and priming. Additional Tips for a Perfect Drywall Finish Sanding Between Coats: For the best results, lightly sand the surface between coats to remove any bumps or ridges. Use fine-grit sandpaper (120-150 grit) to achieve a smooth finish. Patience is Key: Allow each coat to dry completely before applying the next one. Rushing the process can lead to cracks and uneven surfaces. Choose the Right Joint Compound: All-purpose joint compound is great for all coats, but a lightweight compound is easier to work with for the final coat and sanding. Feathering Edges: Feather the edges of each coat wider than the previous one. This technique helps blend the compound into the drywall, making the seams disappear. When Are Additional Coats Needed? While three coats are typically sufficient for most drywall projects, certain situations may require additional coats: Large Gaps or Damage: If you’re repairing significant damage or large gaps, you might need an extra coat to build up the surface. Textured Walls: If you’re matching an existing texture, additional coats may be needed to achieve the desired effect. High-End Finishes: For ultra-smooth finishes, such as those required for glossy paint or specific design features, a fourth coat may be necessary. Tools You’ll Need for Drywall Mud Application Here’s a quick checklist of must-have tools for drywall mud application: Taping knife set (4, 6, 8, 10, and 12-inch knives) Drywall mud pan Sanding sponge or sandpaper (120-150 grit) Joint compound (all-purpose for the first two coats, lightweight for the final coat) Drywall tape (paper or mesh) Dust mask and safety goggles (for sanding) Investing in quality tools can make the job easier and help achieve a professional finish. Trust the Experts at Windsor Drywallers Drywall finishing is a skill that requires practice, patience, and the right technique. If you’re looking for a seamless, professional finish, trust the experts at Windsor Drywallers. Our team has years of experience in drywall installation and repair, ensuring that your walls look perfect every time. Whether it’s a new construction project or a home renovation, we have the skills and expertise to handle it all. Contact us today for a free estimate and let’s transform your space into a beautifully finished area. Ready to Transform Your Space? At Windsor Drywallers , we’re dedicated to providing high-quality drywall services in Windsor, Ontario. From repairs to full installations, we’ve got you covered. Get in touch today to learn how we can help with your next project!
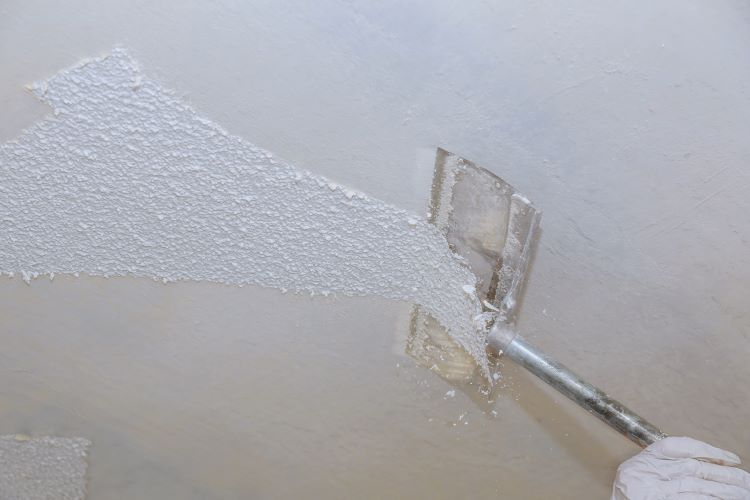
Popcorn ceilings, also known as acoustic ceilings, were once a popular choice for homeowners due to their ability to hide imperfections and dampen sound. However, as design trends have evolved, many homeowners are opting for a sleeker, modern look. If you're ready to update your ceiling and say goodbye to that outdated popcorn texture, you’re not alone. At Windsor Drywallers , we specialize in transforming spaces, and we’re here to guide you through the popcorn ceiling removal process . Whether you’re planning to do it yourself or hire professionals, our step-by-step guide will help you navigate this project with confidence. Why Remove Popcorn Ceilings? Before diving into the removal process, you might wonder why so many homeowners are opting to get rid of popcorn ceilings. Here are some key reasons: Aesthetic Appeal: Popcorn ceilings can make a room feel dated. A smooth, flat ceiling is more in line with modern design trends. Health Concerns: Popcorn ceilings installed before the 1980s may contain asbestos, a hazardous material. If your ceiling was installed during this period, it’s essential to handle removal with caution. Ease of Cleaning: Popcorn ceilings are notorious for collecting dust and cobwebs, making cleaning difficult. A smooth ceiling is much easier to maintain. Tools and Materials You’ll Need Before you begin, make sure you have the following tools and materials on hand: Drop cloths or plastic sheeting (to protect furniture and flooring) Painter’s tape Ladder Utility knife or scraper Spray bottle with water Large buckets Putty knife or drywall scraper Sandpaper or sanding block Ceiling primer and paint (optional) Respirator mask (especially if the popcorn ceiling may contain asbestos) Step 1: Check for Asbestos The first and most important step is to determine if your popcorn ceiling contains asbestos. Homes built before the 1980s are more likely to have this material. If you suspect your ceiling may contain asbestos, do not attempt removal on your own. Contact a professional asbestos removal service to handle the job safely. If your ceiling was installed after the 1980s, it's less likely to contain asbestos, but it's always a good idea to test. You can send a small sample of the ceiling texture to a lab for analysis. If asbestos is present, professionals can safely remove the material without posing a health risk. Step 2: Prepare the Room Proper preparation is key to ensuring a smooth removal process and minimizing the mess. Remove Furniture and Cover Surfaces: Move all furniture out of the room. If you can’t remove certain items, cover them with drop cloths or plastic sheeting. Protect the Floors: Lay down plastic sheeting or old sheets on the floor to catch debris and moisture. Tape Off the Edges: Use painter’s tape to seal off the edges of the room, particularly around the walls, baseboards, and light fixtures, to protect them from water and debris. Step 3: Wet the Popcorn Ceiling One of the easiest ways to remove popcorn ceiling texture is by wetting it. This softens the material, making it easier to scrape off. Fill a Spray Bottle with Water: Using a spray bottle or a garden sprayer, lightly mist small sections of the ceiling. Start with a 4-5 square foot area. Let the Water Soak: Allow the water to sit for about 15-20 minutes. This will help loosen the texture, making it easier to scrape off. Be careful not to oversaturate the ceiling, as excessive moisture can damage the drywall underneath. Step 4: Scrape Off the Popcorn Texture Once the ceiling is sufficiently damp, it’s time to start scraping off the popcorn texture. Use a Scraper or Utility Knife: Using a drywall scraper or putty knife, gently scrape the popcorn texture from the ceiling. Work in small sections, and be sure to hold the scraper at a slight angle to avoid damaging the drywall beneath. Be Gentle: Take your time and be gentle with your scraping to avoid gouging the drywall. It may take a bit of effort, but with patience, the texture will come off. Step 5: Sand and Smooth the Ceiling After the majority of the popcorn texture is removed, you’ll likely need to do some touch-up work to smooth out the ceiling surface. Sand the Surface: Use sandpaper or a sanding block to smooth out any rough spots or stubborn remnants of the popcorn texture. Be sure to wear a respirator mask to avoid inhaling dust particles. Repair Any Damage: If scraping has caused any gouges or imperfections in the drywall, use joint compound to patch them. Allow the compound to dry, then sand it smooth once it’s set. Step 6: Prime and Paint the Ceiling Once the surface is smooth and free of texture, it’s time to finish the ceiling. Apply Primer: Before painting, apply a coat of ceiling primer to ensure the paint adheres properly and to hide any remaining imperfections. Paint the Ceiling: Once the primer has dried, apply a coat or two of your chosen ceiling paint. A matte or flat finish is ideal for ceilings, as it hides imperfections and gives a clean, smooth look. Step 7: Clean Up Now that the popcorn ceiling removal is complete, it’s time to clean up: Remove the Protective Sheets: Carefully remove the drop cloths and plastic sheeting, being mindful not to spread any debris. Dispose of Waste Properly: If you removed large amounts of material, check with your local waste management service for proper disposal guidelines. Conclusion Removing a popcorn ceiling can completely transform the look and feel of a room, creating a modern and clean aesthetic. While the process can be time-consuming, with the right tools and preparation, it’s a DIY project that many homeowners can tackle. However, if you prefer professional help, Windsor Drywallers is here to assist you with all your ceiling renovation needs. Our experienced team can remove popcorn ceilings safely and efficiently, leaving your home with a fresh, smooth ceiling that’s ready for a new look. Ready to say goodbye to your popcorn ceiling? Contact Windsor Drywallers today for expert drywall services and a free estimate!

Renovations often mean updating electrical systems or plumbing, and these projects frequently require cutting into your drywall. While necessary, these repairs can leave unsightly holes and openings. Here at Windsor Drywallers, we understand the importance of restoring your walls to a flawless finish, so we’ve put together a guide on how to effectively repair drywall after electrical or plumbing work. Step 1: Gather Your Materials To achieve a seamless repair, start by gathering all necessary materials: Drywall patch (for smaller holes, use a patch kit; for larger holes, use a drywall sheet) Drywall saw or utility knife Measuring tape Sandpaper (120- to 150-grit) Joint compound Drywall tape (fiberglass mesh tape works well for small repairs) Putty knife Primer and paint to match the existing wall color Dust mask and safety glasses Step 2: Assess the Damage Examine the holes left by the electrical or plumbing work. Small, circular openings from wiring can be repaired quickly, while larger rectangular sections, such as those removed for plumbing repairs, require a more extensive approach. Small Holes (Under 1 Inch): Small, single screw holes can be filled with joint compound. Medium Holes (1–4 Inches): Use a patch or cut a piece of drywall to fit. Large Holes (Over 4 Inches): Use a drywall patch or a new drywall piece and reinforce with mesh tape. Step 3: Cut a Clean Area Around the Hole If the hole isn’t already even, use a utility knife or drywall saw to cut it into a neat square or rectangle. This makes it easier to fit a new drywall patch. Use a straightedge or level to mark even lines around the hole. Ensure any electrical or plumbing components are safely recessed in the wall before proceeding. Step 4: Measure and Cut a Patch For larger holes: Measure the hole and transfer those measurements onto a new piece of drywall. Cut a drywall patch slightly smaller than the hole, so it fits neatly within. If the hole is smaller, consider using a self-adhesive mesh patch. Step 5: Attach the Patch With the patch prepared, you’re ready to secure it to the wall: For small patches, simply press the adhesive patch over the hole. For larger patches, place a piece of backing wood (like a furring strip) behind the hole for stability. Secure it with drywall screws to hold the patch in place. Place the drywall patch over the hole and secure it with drywall screws if necessary. Step 6: Apply Drywall Tape For seamless blending: Place drywall tape over the edges of the patch. Fiberglass mesh tape is ideal for larger patches and offers strong adhesion. Press firmly to ensure it sticks without air bubbles or wrinkles. Step 7: Apply Joint Compound To create a smooth finish: Spread a layer of joint compound over the patch and surrounding tape using a putty knife. Feather the edges so it blends smoothly with the wall surface. Let the first coat dry, then sand it lightly with 120-grit sandpaper to smooth any ridges. Apply a second coat if needed, and sand again after it dries. Step 8: Prime and Paint To complete the repair: Prime the patched area to ensure the paint adheres evenly. Once the primer dries, paint the area to match your wall color. Use the same paint finish (e.g., matte, eggshell, or satin) for a seamless look. Preventing Future Drywall Damage If you anticipate further electrical or plumbing work, consider installing removable wall panels or adding a service access panel in areas frequently worked on. This approach can save you time and effort in the future by reducing the need to cut into drywall. When to Call a Professional While small repairs can be a manageable DIY project, larger holes may benefit from professional expertise. At Windsor Drywallers, we have the tools, materials, and experience to repair any drywall damage quickly and with precision, ensuring your walls look like new. Conclusion Repairing drywall after electrical or plumbing work doesn’t have to be a hassle. By following these steps, you can restore your walls to their original condition. If you need help with a more complex repair, contact Windsor Drywallers —we’re here to provide reliable, high-quality service for your home.
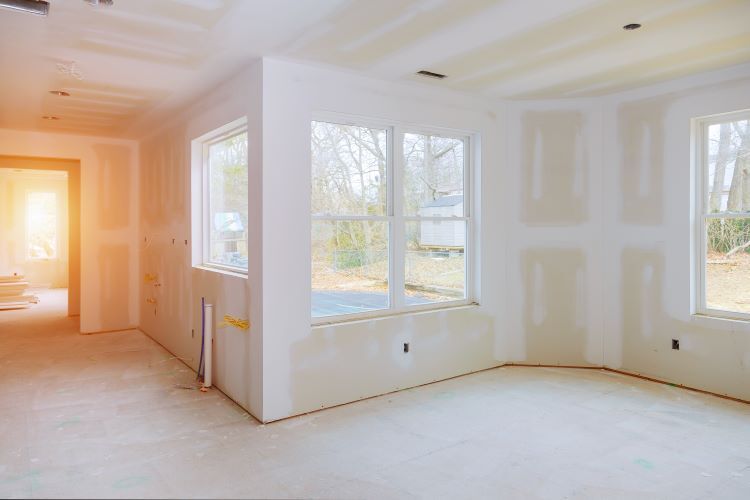
When it comes to installing drywall in high-moisture areas, such as bathrooms, basements, kitchens, and even garages, choosing the right materials and following best practices can make a significant difference in the longevity of your walls. Moisture-prone spaces demand extra attention to ensure drywall maintains its integrity and resists mold and mildew. Here, we’ll explore some essential tips from professionals on installing drywall in high-moisture environments to help keep your walls safe and resilient. 1. Select the Right Type of Moisture-Resistant Drywall Using standard drywall in moisture-prone areas is risky. Fortunately, there are specially designed drywall types that withstand damp environments much better than traditional drywall. Here’s a breakdown of the best options: Green Board: This is a common moisture-resistant drywall with a green paper covering that helps it resist moisture. However, green board is best suited for areas with occasional moisture, not for direct water exposure. Purple Board: Purple board is a step up from green board, offering even more robust mold and moisture resistance. It’s great for bathrooms, kitchens, and other high-humidity areas, providing added durability. Cement Board: For maximum moisture resistance, cement board is an excellent choice. Since it’s cement-based, it’s waterproof and highly mold-resistant, making it ideal for areas that see direct water exposure, like behind showers or sinks. Fiberglass-Faced Drywall: Unlike traditional drywall, which has a paper-facing, fiberglass-faced drywall is highly resistant to mold and mildew. This is especially useful in basements or areas that experience frequent condensation. 2. Use Mold-Resistant Joint Compounds Once you’ve chosen the right moisture-resistant drywall, it’s important to select a mold-resistant joint compound for sealing seams. Standard joint compound can absorb moisture, which could lead to mold growth over time. A mold-resistant joint compound is specially formulated to reduce this risk, providing an additional layer of protection in high-moisture areas. 3. Install a Vapor Barrier In areas where moisture buildup is likely, such as basements or bathrooms, consider installing a vapor barrier behind the drywall. A vapor barrier acts as a protective layer that prevents moisture from reaching the back of the drywall, which can prolong the wall’s lifespan. Types of Vapor Barriers: Plastic sheeting is commonly used for vapor barriers, although some moisture-resistant drywall options may also come with integrated barriers. Proper Placement: Install the vapor barrier on the warm side of the wall (the side facing the drywall) to effectively trap moisture and prevent it from damaging the drywall. 4. Ensure Adequate Ventilation Proper ventilation is key to keeping moisture levels low. In bathrooms, kitchens, or laundry rooms, installing an exhaust fan can help quickly remove steam and humidity. Ventilated areas prevent moisture buildup on walls, keeping drywall drier and less prone to mold. For basements or enclosed spaces, using a dehumidifier can also help regulate moisture levels. 5. Seal Edges and Seams Carefully Carefully sealing edges, seams, and corners is critical in high-moisture areas. Even small gaps can allow moisture to seep in and damage drywall. For best results: Fiberglass Tape: Use fiberglass tape instead of traditional paper tape for high-moisture areas, as it’s more resistant to mold. Apply Mold-Resistant Caulk: Use a mold-resistant caulk to seal the edges between the drywall and any fixtures (like tubs or sinks) to create a watertight seal. Additional Coats: Apply multiple coats of joint compound to ensure a seamless, smooth finish that’s resistant to water penetration. 6. Opt for Mold-Resistant Primer and Paint Once the drywall is installed, applying mold-resistant primer and paint can further protect it from moisture. Mold-resistant primers create a protective layer that helps keep mold at bay, while high-quality paint designed for humid areas can resist moisture penetration. These finishes are especially valuable in bathrooms, kitchens, and basements. 7. Consider Cement or Tile Backer Boards for Direct Water Exposure If you’re installing drywall in an area with direct water exposure, like a shower or bath surround, consider using cement or tile backer boards instead of drywall. These materials are designed for wet areas, offering unmatched water resistance. Cement board is an excellent choice as a base for tile in showers and wet rooms, as it won’t absorb water like traditional drywall, ensuring a longer-lasting installation. 8. Perform Regular Maintenance Even with the best moisture-resistant drywall and installation techniques, it’s important to regularly inspect your walls in high-moisture areas. Look for signs of moisture buildup, such as discoloration, peeling paint, or soft spots. Addressing any issues early can prevent extensive repairs down the line. Check Sealants Regularly: Over time, caulk and sealants can wear out, so reapplying as necessary helps maintain a watertight barrier. Monitor Ventilation Systems: Ensure that exhaust fans and dehumidifiers are functioning properly to maintain optimal moisture control. Benefits of Professional Installation in High-Moisture Areas While DIY drywall installation is tempting, working with professionals like Windsor Drywallers ensures your project is done correctly, especially in challenging environments. Here’s why professional installation makes a difference: Expertise in Material Selection: Professionals can recommend the best type of drywall for your specific needs and environment, from green board to fiberglass-faced options. Proper Sealing and Finishing: Correctly sealing seams and applying moisture-resistant finishes is key in humid areas. Professionals ensure a meticulous application, preventing potential leaks or mold issues. Efficient Installation: Professional installers work efficiently, reducing downtime and minimizing disruptions to your home. Their experience ensures that the job is completed quickly and accurately. Conclusion Drywall in high-moisture areas requires special attention to material choice, sealing techniques, and ventilation to maintain durability and resist mold. By selecting the right type of moisture-resistant drywall, adding a vapor barrier, sealing seams, and using mold-resistant finishes, you can effectively protect your walls from moisture damage. For optimal results, consider professional installation from Windsor Drywallers to ensure a lasting, high-quality finish. When you’re ready to upgrade or install moisture-resistant drywall in your bathroom, basement, or garage, contact Windsor Drywallers for expert guidance and installation. Our team is equipped to handle all aspects of drywall installation, helping you achieve a safe, durable, and visually appealing finish in any space.
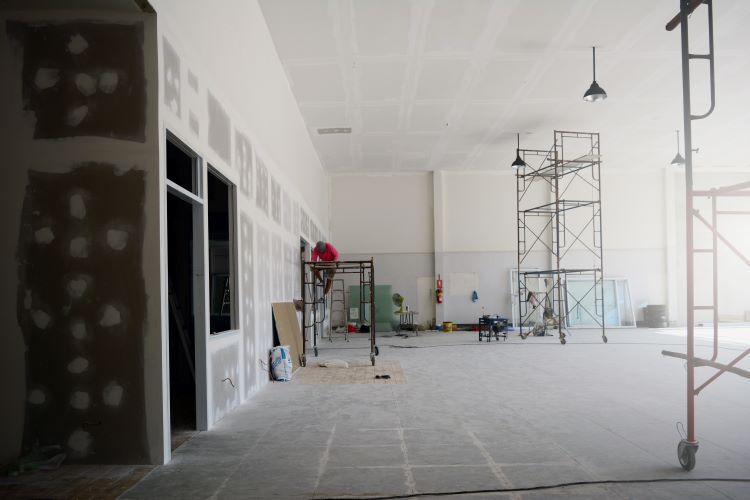
In the construction of commercial buildings, every material plays a critical role in the overall durability and performance of the structure. One material that often goes unnoticed but has a significant impact on the building's longevity is drywall. Choosing the right quality of drywall is crucial for ensuring that commercial buildings can withstand the test of time. At Windsor Drywallers , we understand the importance of quality drywall in commercial projects , and in this article, we will explore how drywall quality affects the durability and lifespan of commercial buildings. 1. Structural Integrity and Stability High-quality drywall contributes to the structural integrity of commercial buildings. While drywall is not a load-bearing material, it plays a crucial role in reinforcing walls and ceilings. Inferior drywall products can lead to issues such as sagging, cracking, and even bulging over time, compromising the stability of the interior spaces. In commercial settings where heavy machinery, foot traffic, or other operational activities occur, drywall needs to be able to hold up under these stresses. Using durable, high-grade drywall ensures that walls remain solid, reducing the need for frequent repairs or replacement. 2. Fire Resistance In commercial buildings, fire safety is a top priority. Many building codes require specific types of drywall for fire-rated walls and ceilings. Fire-resistant drywall, often referred to as Type X or Type C drywall, contains special additives that help slow the spread of fire. Choosing high-quality, fire-rated drywall can provide additional time for occupants to evacuate and for firefighters to control the blaze, thereby protecting both people and property. Inferior drywall products may fail to meet fire safety standards, putting the entire building at risk. 3. Moisture and Mold Resistance Moisture is one of the leading causes of drywall damage in commercial buildings. In environments like restaurants, hospitals, or factories where humidity levels can be high, choosing moisture-resistant drywall is essential. Poor-quality drywall is more prone to water damage, leading to issues like warping, mold growth, and weakened walls. Moisture-resistant drywall, often referred to as green board or blue board, is specifically designed to resist mold and mildew. By opting for high-quality drywall with moisture resistance, commercial property owners can prevent costly repairs and ensure that the interior of the building remains dry and healthy. 4. Acoustic Performance In commercial settings like offices, schools, or hotels, sound insulation is crucial for creating a comfortable environment. Poor-quality drywall often lacks the density required to block or reduce noise transmission between rooms. This can lead to disruptions, decreased productivity, and dissatisfaction among tenants or employees. High-quality drywall designed for soundproofing, such as gypsum board with sound-dampening properties, can significantly improve the acoustic performance of a commercial building. This investment in better materials results in quieter, more comfortable workspaces and tenant satisfaction. 5. Energy Efficiency Drywall also plays a role in the energy efficiency of a commercial building. High-quality drywall with proper insulation properties can help maintain indoor temperatures, reducing the strain on heating and cooling systems. This not only improves the comfort of the building’s occupants but also lowers energy costs. In contrast, using substandard drywall may lead to gaps, poor insulation, and drafts, resulting in higher energy consumption and increased utility bills. Investing in energy-efficient drywall can lead to long-term savings and contribute to the sustainability of the building. 6. Cost of Repairs and Maintenance While lower-quality drywall might seem like a cost-saving option in the short term, it often leads to higher maintenance costs down the road. Poor drywall installation and materials can result in cracks, holes, or water damage that need frequent attention. On the other hand, using premium drywall minimizes the risk of damage and reduces the need for regular maintenance. This not only saves on repair costs but also ensures that the building remains in top condition, enhancing its overall value and appeal to tenants or buyers. Conclusion The quality of drywall used in commercial buildings has a direct impact on the building's longevity, safety, and overall performance. From structural integrity to fire resistance and moisture protection, choosing high-grade drywall is essential for long-term success. At Windsor Drywallers , we specialize in providing high-quality drywall solutions for commercial projects in Windsor, Ontario, ensuring that your building remains durable, safe, and efficient for years to come. If you're planning a commercial construction project or need drywall installation services, contact us today to learn more about how we can help you achieve the best results with top-notch drywall materials.
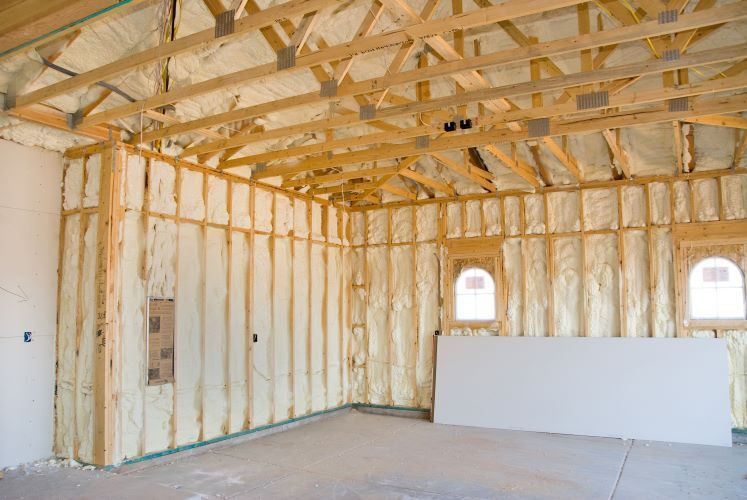
When it comes to drywall installation , one of the most important decisions you’ll make is choosing the right drywall thickness for your project. Drywall, also known as gypsum board, comes in a variety of thicknesses, each suited to different purposes and spaces in your home or business. Picking the correct thickness ensures your walls and ceilings are durable, insulated, and ready for finishing. At Windsor Drywallers , we know that selecting the right drywall is crucial for achieving a professional, long-lasting result. In this article, we’ll guide you through the most common drywall thicknesses and help you determine which option is best for your project. Common Drywall Thicknesses Drywall typically comes in four standard thicknesses: 1/4 inch 3/8 inch 1/2 inch 5/8 inch Each thickness serves a different function and is recommended for specific applications. Here’s a breakdown of what each thickness is used for: 1. 1/4-Inch Drywall This is the thinnest option available and is often used for curved surfaces or as a laminate layer over existing walls. Because of its flexibility, 1/4-inch drywall is perfect for creating arches or bending around other curved architectural features. Best uses: Overlaying damaged walls, curved walls, arches Drawback: Not suitable for main walls or ceilings, as it's too thin to provide sufficient strength or soundproofing. 2. 3/8-Inch Drywall While less common in new construction, 3/8-inch drywall is sometimes used as a lightweight option for remodeling and patching existing walls. It's slightly more robust than 1/4-inch drywall but still not strong enough for most structural purposes. Best uses: Patching existing drywall or covering lightweight interior walls Drawback: Lacks the rigidity and strength needed for most modern wall and ceiling applications. 3. 1/2-Inch Drywall This is the most common drywall thickness used in residential and commercial construction. It offers a balance of strength and flexibility and is suitable for both walls and ceilings. Most homes in Windsor and across Ontario have walls made from 1/2-inch drywall. Best uses: Standard interior walls and ceilings in living rooms, bedrooms, and hallways Benefits: Strong enough to handle regular wear and tear, easy to install, and compatible with most framing types. 4. 5/8-Inch Drywall The thickest standard option, 5/8-inch drywall is known for its superior soundproofing and fire resistance. It is commonly used in commercial buildings, basements, and shared walls between rooms where fire ratings or soundproofing are essential. Best uses: Commercial spaces, garages, soundproofing, and fire-rated walls or ceilings Benefits: Provides additional strength, noise reduction, and safety in fire-prone areas. How to Choose the Right Thickness Now that you’re familiar with the available options, let’s look at how to choose the right drywall thickness based on your project’s specific needs: 1. Walls or Ceilings? The thickness you choose may depend on whether you’re working on walls or ceilings: For walls, 1/2-inch drywall is usually the standard thickness used in most residential projects. It offers sufficient strength to support paint, wallpaper, and artwork, and it’s easy to install over wood or metal studs. For ceilings, you may want to use 5/8-inch drywall for additional support, especially if your ceiling has a large span or is in a space like a garage or basement. The added thickness prevents sagging over time and offers better soundproofing. 2. Fire Resistance and Safety If you’re installing drywall in a garage, basement, or anywhere that may require additional fire protection, opt for 5/8-inch fire-rated drywall. This thicker drywall can slow the spread of fire between rooms, providing crucial time for occupants to evacuate safely. Many building codes in Windsor and throughout Ontario mandate the use of fire-rated drywall in certain areas of homes and commercial buildings, so make sure to check with local regulations when planning your project. 3. Soundproofing Needs In spaces like bedrooms, home offices, or media rooms, soundproofing is often a priority. Thicker drywall like the 5/8-inch option can help minimize sound transmission between rooms, creating quieter, more private spaces. For enhanced soundproofing, consider pairing the thicker drywall with insulation or additional soundproofing materials. 4. Curved or Special Architectural Features If your project involves curved walls, arches, or other unique architectural elements, you’ll want to use 1/4-inch drywall due to its flexibility. This thin drywall can be bent and shaped without cracking, making it ideal for achieving smooth, rounded finishes. Keep in mind that these thin layers may need to be applied over an existing surface for added support. 5. Repair or Remodel If you’re working on a repair or remodeling project where you’re simply patching or covering up old walls, 3/8-inch drywall can be an excellent choice. It’s thinner and easier to handle for small fixes and overlays, allowing you to create a smooth, finished look without adding too much thickness to the existing walls. The Importance of Getting It Right Choosing the right drywall thickness for your project is about more than just aesthetics; it directly impacts the durability, soundproofing, and safety of your walls and ceilings. Whether you’re renovating your home, finishing a basement, or working on a commercial property, the correct drywall thickness ensures the integrity and longevity of your space. Conclusion Selecting the right drywall thickness is a critical part of ensuring the success of any construction or renovation project. From thin, flexible sheets for curved walls to thicker, fire-rated drywall for garages and commercial spaces, Windsor Drywallers has the expertise to guide you through the process. Contact us today to learn more about how we can help with your next drywall project in Windsor, Ontario, and make sure you get the right materials for your home or business!
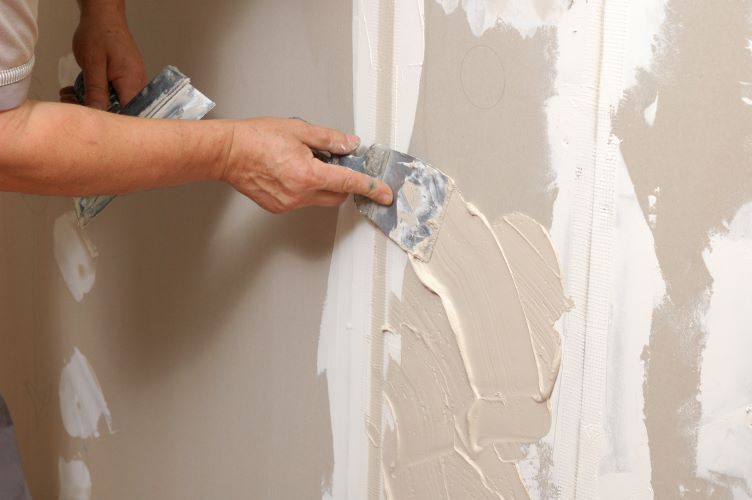
Drywall taping and mudding is a crucial step in achieving a smooth, seamless finish for your walls and ceilings. Whether you're working on a new construction project or making repairs, mastering the proper techniques and knowing when to apply each coat of joint compound is essential for a high-quality finish. One of the most common questions that arises during the drywall finishing process is: When is the right time to apply the second coat of mud? In this article, we’ll walk you through the importance of the second coat, the timing for application, and some pro tips to ensure that your drywall project looks flawless. The Role of the Second Coat in Drywall Mudding Before jumping into when to apply the second coat, it’s important to understand its role in the drywall finishing process. The first coat of mud, or joint compound, is primarily used to embed the tape over the seams between drywall sheets. It fills the gaps and prepares the surface for additional layers. However, the first coat typically isn't enough to create a perfectly smooth surface. That's where the second coat comes in. The second coat smooths out the rough areas left by the first coat and helps to feather the edges of the drywall tape, making the seams less visible. This coat also allows you to start building up the surface to match the level of the surrounding drywall. How to Know When It’s Time for the Second Coat The most critical factor in determining when to apply the second coat of mud is drying time. Applying the second coat too early can result in uneven surfaces, air bubbles, or cracks in the finish. Here are the key things to consider when timing your second coat: Ensure the First Coat is Completely Dry Drying Time: The first coat of joint compound must be completely dry before applying the second coat. Depending on the type of compound used (all-purpose, lightweight, or setting-type) and the environmental conditions, drying times can vary. On average, it takes about 24 hours for the first coat to dry completely, though it can take longer in high-humidity environments. Checking for Dryness: To check if the first coat is ready for the second layer, lightly touch the surface. If it feels cool or damp to the touch, it's not fully dry. The surface should feel dry and hard before you proceed with the second coat. Look for Shrinkage and Gaps As the first coat dries, you may notice slight shrinkage in the joint compound, especially over larger seams or corners. This is completely normal and is another reason why a second coat is necessary. The second coat will fill in any remaining gaps and provide a more even surface for sanding and finishing. Applying the Second Coat of Mud Once you’ve determined that the first coat is completely dry, it’s time to apply the second coat. Here are the steps and best practices to follow for this stage of drywall finishing: Sand Lightly Before Applying the Second Coat Before applying the second coat, lightly sand the first coat with fine-grit sandpaper (usually 120-150 grit). This step helps smooth out any high spots, ridges, or imperfections. Be gentle, as the goal is to even out the surface, not to sand away the mud entirely. Use a Wider Drywall Knife For the second coat, use a wider drywall knife (10-12 inches) to spread the mud over the seams. This allows you to feather the edges of the compound further, blending it seamlessly with the surrounding drywall. Feathering is crucial to making the seams disappear when the wall is painted. Apply Even, Thin Layers The second coat should be thinner than the first. Start by applying a moderate amount of joint compound to the seam and spreading it out with smooth, even strokes. Feather the edges by applying less pressure as you move the knife away from the seam. The goal is to blend the seam with the surrounding drywall surface so it’s barely noticeable. Let the Second Coat Dry Completely Like the first coat, the second coat will need ample time to dry. Depending on the compound used, this can take another 24 hours. During this time, avoid touching or sanding the surface to prevent damaging the still-wet mud. Common Mistakes to Avoid When Applying the Second Coat To achieve the best results with your second coat of mud, here are a few common mistakes to watch out for: Rushing the Drying Process: Patience is key in drywall mudding. If you apply the second coat before the first is completely dry, it can lead to cracking, bubbles, or poor adhesion. Always check for dryness and err on the side of caution. Applying Too Much Mud: It can be tempting to apply a thick second coat to speed up the process, but this often leads to more sanding and potential unevenness. It’s better to apply thinner layers and do additional coats if necessary. Not Feathering the Edges: Failing to feather the edges of the second coat can result in visible seams. Use a light touch and wide strokes to ensure a smooth transition from the seam to the drywall. Final Steps: The Third Coat and Sanding After the second coat has dried, you’ll likely need to apply a third coat to refine the surface and address any remaining imperfections. The third coat is typically very thin, and a wider knife (12-14 inches) is used to ensure an even finish. Once the final coat is dry, sand the surface lightly to achieve a smooth finish ready for priming and painting. Conclusion Drywall taping and mudding is an art that requires precision, timing, and patience. The second coat is a critical part of the process, ensuring that the seams between drywall sheets are smooth, invisible, and ready for finishing. By following the right steps and allowing proper drying times, you’ll create a flawless drywall surface that enhances the overall quality and appearance of your walls and ceilings. At Windsor Drywallers, we specialize in professional drywall installation and finishing, ensuring your home’s interior looks seamless and polished. If you’re tackling a drywall project and need expert advice or services, don’t hesitate to reach out to our team. We’re here to help you achieve the perfect drywall finish every time.
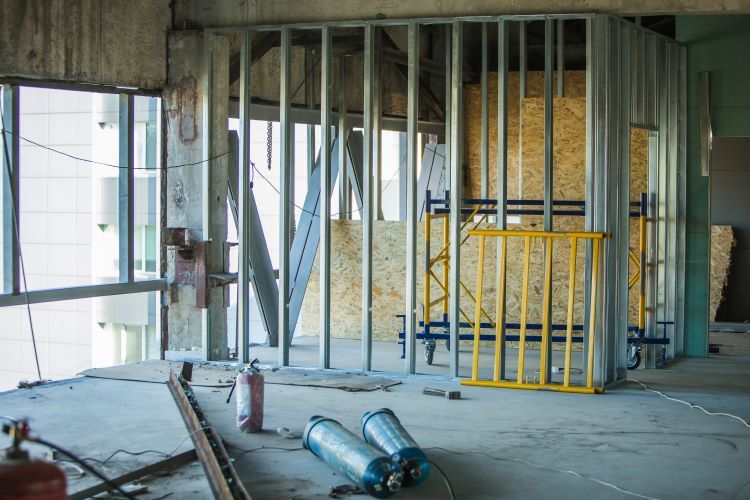
When it comes to drywall framing, precision is everything. Whether you’re building a new wall or finishing a basement, accurate measurements form the backbone of a successful drywall installation. For homeowners in Windsor, Ontario, working with Windsor Drywallers means getting the expertise needed to ensure your framing is done with meticulous care, ensuring long-lasting, professional results. In this article, we’ll discuss why accurate measurements in drywall framing are so crucial and how they contribute to the quality of your final walls. 1. The Foundation of a Strong Structure Drywall framing serves as the skeleton of your walls. This framework, usually made of wood or metal studs, supports the drywall sheets and ensures your walls are straight, stable, and durable. If the framing is done incorrectly or without precise measurements, the entire structure can be compromised. Accurate measurements ensure that each stud is spaced evenly and properly aligned. In most cases, studs are spaced 16 or 24 inches apart, depending on the project’s requirements. Even small deviations in these measurements can lead to weak spots in the wall, causing future issues like bowing, cracks, or even structural instability. At Windsor Drywallers, we understand the importance of getting the measurements right from the start to guarantee the strength of your walls. 2. Ensuring a Flawless Drywall Finish Inaccurate framing measurements can lead to visible imperfections in your drywall finish. For example, if the studs aren’t properly aligned, it can result in uneven surfaces or gaps between drywall sheets, which can be difficult to conceal even with mudding and taping. Uneven surfaces not only affect the aesthetic appeal of your walls but can also make it challenging to hang artwork, install cabinetry, or apply paint and wallpaper. By taking accurate measurements and ensuring perfect stud placement, Windsor Drywallers makes sure your drywall fits snugly and smoothly over the frame. This creates a flawless surface, ready for finishing touches, and ensures that your walls look seamless and professional. 3. Reducing Wastage of Materials Precision in drywall framing helps to reduce the wastage of materials, saving you time and money. When measurements are off, you may end up cutting drywall sheets incorrectly, leading to unnecessary material loss. Additionally, incorrect framing may require rework or additional materials to correct mistakes, further increasing the project’s costs. At Windsor Drywallers, we believe in efficiency and accuracy. By carefully measuring and planning the framing layout, we minimize waste, optimize material usage, and avoid costly mistakes. This not only keeps your project within budget but also reduces construction waste, making it more environmentally friendly. 4. Facilitating Smooth Installation of Utilities Drywall framing is more than just the structure for your walls—it also needs to accommodate essential utilities such as electrical wiring, plumbing, and HVAC ducts. Without precise measurements, you might end up with framing that interferes with these installations, leading to complications and delays in the project. Accurate measurements ensure that there’s enough space within the walls for these utilities to be installed smoothly and without issues. This prevents the need for costly adjustments and ensures that your electrical outlets, plumbing lines, and vents are properly positioned and accessible. 5. Adhering to Building Codes and Standards Accurate measurements aren’t just important for aesthetics and functionality—they’re also a matter of safety. Building codes in Windsor, Ontario, and across Canada specify certain requirements for wall framing, such as stud spacing, load-bearing capacity, and fire resistance. Failing to meet these standards due to inaccurate measurements can result in code violations, fines, or even unsafe conditions in your home. Windsor Drywallers is experienced in adhering to all local building codes and regulations. We ensure that every framing project meets or exceeds the necessary standards, so you can have peace of mind knowing your walls are safe and compliant with the law. 6. Saving Time and Avoiding Delays Inaccurate measurements can cause frustrating delays in your project. If framing errors go unnoticed, you may discover issues later in the construction process, requiring costly rework and extending your timeline. For homeowners eager to complete a renovation or new build, these delays can be inconvenient and stressful. Accurate framing from the outset ensures that the project stays on schedule. Windsor Drywallers uses precise measurements to get the framing right the first time, minimizing the risk of delays and ensuring a smooth drywall installation process. Conclusion: The Windsor Drywallers Difference When it comes to drywall framing, attention to detail and accuracy are non-negotiable. Accurate measurements not only ensure that your walls are strong and stable but also play a crucial role in achieving a flawless finish, reducing waste, and facilitating the installation of utilities. At Windsor Drywallers, we take pride in our craftsmanship and precision, ensuring that every project meets the highest standards. If you’re planning a drywall project in Windsor, Ontario, and want the best results, trust Windsor Drywallers to deliver top-notch framing and drywall services. Contact us today to learn more about how we can bring your vision to life.