Preparing Your Drywall for a Flawless Paint Job

Painting is one of the most effective ways to refresh the look of your home’s interior. However, the key to achieving a flawless paint job lies in the preparation of your drywall. Without proper preparation, even the best paint can’t hide imperfections or ensure a smooth finish. Here’s a step-by-step guide to preparing your drywall for a paint job that will leave your walls looking pristine.
Step 1: Inspect Your Drywall
Before you begin any work, it’s essential to inspect your drywall for any damage or imperfections. Common issues include:
- Nail Pops: These occur when nails or screws push through the drywall, leaving a small bump or hole.
- Dents and Dings: Everyday activities can cause minor dents or dings in your walls, especially in high-traffic areas.
- Cracks: Small cracks can develop over time, particularly around windows, doors, or where two drywall sheets meet.
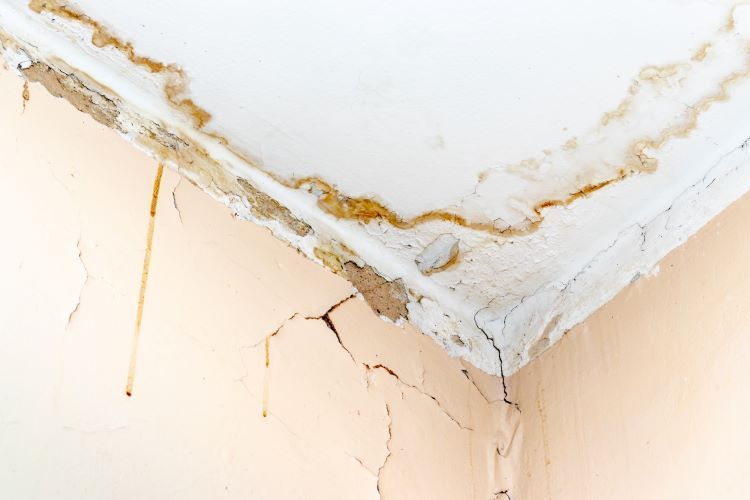
- Water Damage: Look for signs of water damage, such as stains, bubbling, or soft spots in the drywall.
Addressing these issues before painting is crucial for a smooth finish. If the damage is extensive, consider contacting a professional drywall repair service like Windsor Drywallers to ensure proper fixes.
Step 2: Repair Any Damage
Once you’ve identified any imperfections, it’s time to repair them:
- Nail Pops: Use a screwdriver to drive the nail or screw back into place, ensuring it’s slightly recessed below the surface of the drywall. Then, cover the area with joint compound and sand it smooth once it’s dry.
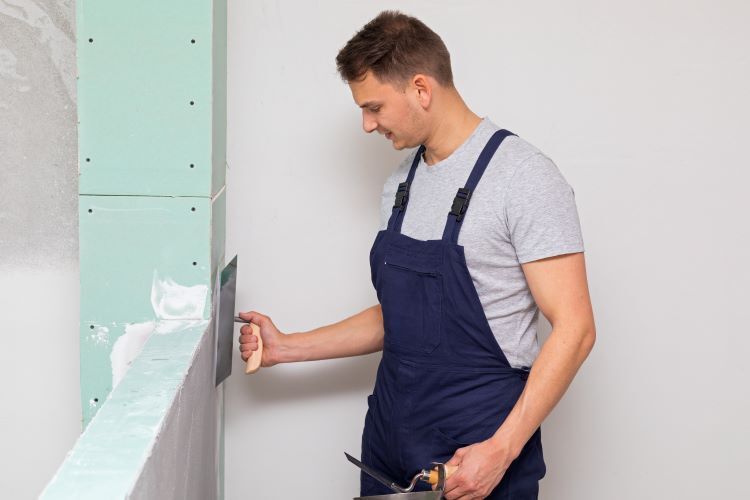
- Dents and Dings: Fill small dents and dings with a lightweight spackle or joint compound. Once dry, sand the area until it’s flush with the surrounding wall.
- Cracks: For small cracks, use joint compound or a patching compound to fill them. For larger cracks, you may need to apply a fiberglass mesh tape over the crack before applying the compound.
- Water Damage: If you’ve discovered water damage, it’s essential to address the source of the moisture first. Then, cut out the damaged drywall and replace it with new drywall. Seam the edges with joint compound and sand smooth.
Step 3: Sand the Walls
Sanding is a critical step in preparing your drywall for paint. It smooths out any repairs, removes texture inconsistencies, and creates a surface that the paint can adhere to easily.
- Use Fine-Grit Sandpaper: Start with a medium-grit sandpaper (around 120-150 grit) to smooth out larger imperfections. Then, switch to a fine-grit sandpaper (220 grit) for a final pass. Be sure to sand in a circular motion to avoid leaving any lines or grooves.
- Don’t Forget the Corners: Use a sanding sponge or a sanding block to get into the corners and along the edges where walls meet.
- Vacuum the Dust: After sanding, vacuum the walls thoroughly to remove all dust. A clean surface is essential for paint adhesion.
Step 4: Apply a Primer
Applying a primer is a step that should never be skipped, especially on new drywall or after significant repairs. Primer serves several purposes:
- Seals the Drywall: Primer seals the porous surface of the drywall and joint compound, preventing the paint from soaking in unevenly.
- Enhances Paint Adhesion: Primer helps the paint adhere better to the wall, reducing the likelihood of peeling or flaking.
- Uniforms the Surface: Primer creates a uniform surface, which is especially important if you’re painting over patched or repaired areas.
Choose a primer that’s appropriate for your wall type. For most drywall, a standard water-based primer will work well. If you’re dealing with stains or water damage, consider using a stain-blocking primer.
Step 5: Final Inspection
After the primer has dried, inspect the walls once more. Look for any remaining imperfections, such as small bumps, rough patches, or areas where the primer didn’t fully cover. If necessary, lightly sand the areas and apply a bit more primer.
Step 6: Start Painting
With your drywall properly prepared, you’re ready to start painting. Be sure to use high-quality paint and tools to achieve the best results. Apply the paint in thin, even coats, allowing each coat to dry completely before applying the next. Depending on the color and type of paint, two to three coats may be necessary.
Conclusion
Preparing your drywall for a paint job is a process that requires attention to detail and a bit of patience, but the results are well worth the effort. By following these steps, you’ll ensure that your walls are smooth, flawless, and ready to showcase your chosen paint color.
For more extensive repairs or if you want to guarantee a professional finish, consider reaching out to Windsor Drywallers. Our expert team can handle all your drywall needs, ensuring a perfect canvas for your next painting project.
You might also like


