How to Insulate Drywall in Older Homes
Insulating drywall in older homes can significantly improve energy efficiency, enhance comfort, and reduce utility bills. However, older homes often present unique challenges due to their construction methods, existing insulation (or lack thereof), and structural considerations. In this guide, we’ll explore the key steps and considerations for properly insulating drywall in older homes.
Why Insulating Older Homes Is Important
Older homes are often less energy-efficient than modern ones. This is largely due to outdated building materials and techniques that didn’t prioritize insulation. As a result, these homes can be drafty in the winter, uncomfortably warm in the summer, and expensive to heat and cool. By upgrading the insulation in your walls, you can significantly improve your home's comfort and energy efficiency.
Assessing the Existing Insulation
Before you begin any insulation project, it's crucial to assess the existing state of your walls. This involves:
- Inspecting the Walls: Carefully inspect the walls for any signs of damage, mold, or previous insulation. In older homes, it’s not uncommon to find that insulation is either missing or has settled over time, leaving gaps that reduce its effectiveness.
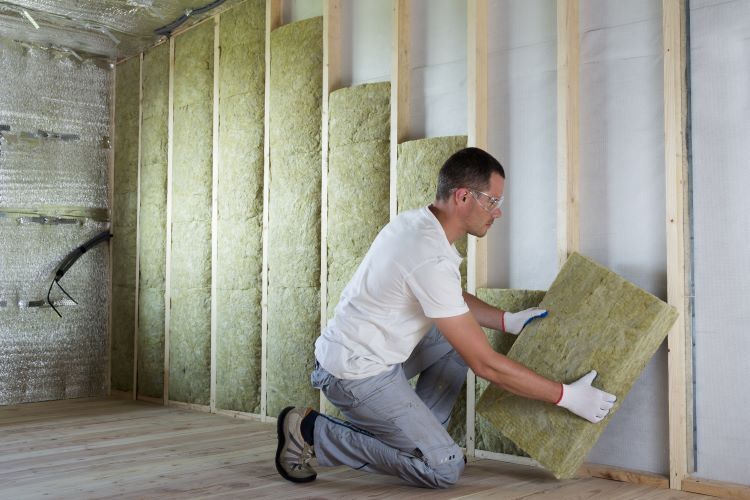
- Identifying the Wall Type: Determine whether the walls are solid masonry, wood frame, or another type. This will influence the type of insulation you can use and the installation method.
- Checking for Moisture Issues: Older homes are more prone to moisture problems, which can lead to mold and rot. Address any moisture issues before installing new insulation to prevent future damage.
Choosing the Right Insulation Material
The type of insulation you choose depends on the structure of your home and your specific needs. Here are some popular options for insulating older homes:
- Fiberglass Batts: Fiberglass batts are a cost-effective and widely used insulation material. They are easy to install between wall studs but may not be the best option for irregularly shaped or solid walls.
- Blown-In Insulation: Blown-in insulation, such as cellulose or fiberglass, is ideal for adding insulation to existing walls without major demolition. Holes are drilled into the walls, and the insulation is blown in, filling cavities and improving thermal performance.
- Spray Foam Insulation: Spray foam insulation offers excellent thermal resistance and air sealing properties. It’s particularly useful in older homes with irregular wall spaces, as it expands to fill gaps and cracks. However, it can be more expensive than other options.
- Rigid Foam Boards: Rigid foam boards provide high insulation value and can be used in combination with other materials. They are often applied to the exterior of the wall before adding new siding but can also be used in interior applications.
Steps for Insulating Drywall in Older Homes
Once you’ve selected the appropriate insulation material, follow these steps to ensure a successful installation:
1. Prepare the Walls: Begin by removing any existing drywall or wall coverings to expose the studs or masonry. If the walls are in good condition and you’re using blown-in insulation, you may only need to drill holes.
2. Address Air Leaks: Seal any gaps, cracks, or holes in the walls with caulk or spray foam to prevent air leakage. This step is crucial in older homes where drafts are common.
3. Install Insulation:
- For fiberglass batts, cut the insulation to fit snugly between the studs, ensuring there are no gaps or compression.
- For blown-in insulation, use a blower machine to fill wall cavities through drilled holes. Make sure the insulation is evenly distributed.
- For spray foam, apply the foam in layers, allowing it to expand and fill all voids. Trim any excess foam after it has cured.
4. Install a Vapor Barrier: In older homes, adding a vapor barrier may be necessary to prevent moisture from penetrating the walls and causing damage. Use plastic sheeting or vapor-retardant paint as a barrier between the insulation and the drywall.
5. Install New Drywall: Once the insulation is in place, install new drywall over the insulated walls. Secure the drywall to the studs and finish with tape and joint compound. Finally, sand and paint the walls as desired.
6. Consider Additional Insulation for Exterior Walls: If your home has solid masonry walls or lacks exterior insulation, consider adding rigid foam boards or another form of exterior insulation before re-siding. This will provide an additional layer of thermal protection.
Professional Help vs. DIY
While insulating drywall in older homes can be a DIY project, it’s often best to consult with a professional, especially if your home has structural complexities or moisture issues. Professional contractors like Windsor Drywallers have the expertise to assess your home’s needs and recommend the best insulation solutions, ensuring a high-quality installation that maximizes energy efficiency.
Conclusion
Upgrading the insulation in an older home is one of the best investments you can make to improve comfort and reduce energy costs. By carefully selecting the right insulation materials and following proper installation techniques, you can transform your home into a more energy-efficient and comfortable living space.
For expert advice and professional installation, consider reaching out to Windsor Drywallers. We’re here to help you achieve the best results for your home.
You might also like


