Preventing and Fixing Nail Pops in Your Drywall
Nail pops are a common issue that can arise in drywall installations, especially in homes that experience seasonal changes in temperature and humidity. While they are generally not a structural problem, they can create unsightly bumps in your walls and ceilings. Understanding how to prevent and fix nail pops will help keep your drywall in top shape.
For homeowners in Windsor, Ontario, where the seasonal shifts can affect construction materials, addressing nail pops quickly is key to maintaining the aesthetic and integrity of your walls. Here’s how you can prevent and fix nail pops effectively.
What Are Nail Pops?
Nail pops occur when the head of a nail or screw starts to push outward from the drywall surface. This results in a visible bump or small circular crack in the paint or drywall surface. The main causes of nail pops include:
- Natural Movement of Wood: As homes settle or as the framing wood expands and contracts due to humidity and temperature fluctuations, nails or screws can shift and push through the drywall.
- Improper Fastening: If nails or screws weren’t properly secured during the installation of the drywall, they can loosen over time, leading to nail pops.
- Inadequate Drywall Support: Lack of proper support behind the drywall can cause fasteners to come loose and push through the surface.
Preventing Nail Pops in Drywall
While nail pops are common, there are steps you can take during drywall installation to minimize their occurrence.
- Use Screws Instead of Nails: When installing drywall, screws provide a better long-term hold than nails, especially in areas where temperature and humidity fluctuate significantly. Screws anchor the drywall more securely, reducing the risk of pops as the wood frame moves.
- Space Fasteners Properly: Proper spacing between screws or nails during installation is essential. For walls, fasteners should be placed every 12 to 16 inches along the stud, and for ceilings, every 12 inches. This prevents unnecessary movement that can loosen fasteners.
- Use Drywall Adhesive: Applying drywall adhesive along the studs and other framing members before installing drywall sheets can help create a stronger bond between the drywall and the frame, reducing movement and nail pops.
- Allow Wood to Dry Properly: If possible, ensure that the wood framing has adequately dried and settled before drywall installation. Wood that is still too wet or green will shrink as it dries, increasing the likelihood of nail pops.
Fixing Nail Pops in Drywall
If nail pops have already appeared in your drywall, here’s how to fix them to restore a smooth, flawless finish.
1. Remove the Pop
The first step is to address the popped nail or screw. Remove any loose paint or drywall around the pop using a putty knife or utility blade. If the fastener is a nail, drive it back into the drywall using a hammer. For screws, tighten them back into place with a screwdriver or drill.
2. Secure with a New Screw
To ensure that the fastener stays secure and doesn’t pop again, insert a new drywall screw about 1-2 inches above or below the original pop. This will anchor the drywall more securely and prevent further movement.
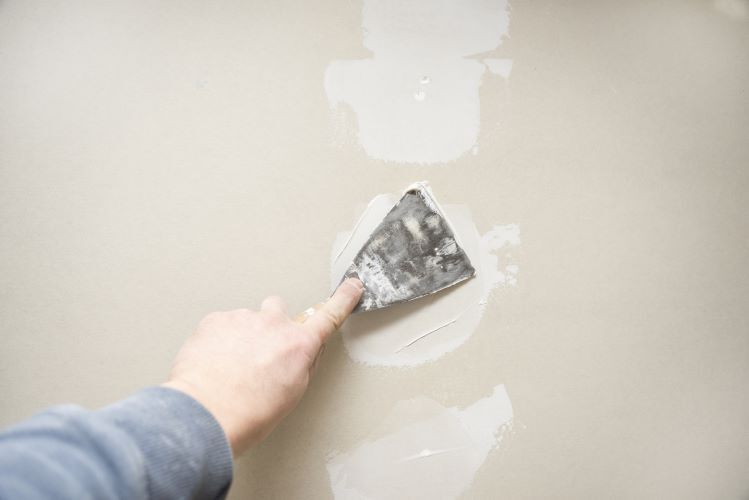
3. Fill and Sand the Area
Once the fastener is secure, cover the pop and the new screw with joint compound. Use a putty knife to apply the compound smoothly, then allow it to dry completely. Once dry, sand the area to create an even surface.
4. Prime and Paint
After the area has been sanded, apply a coat of primer before repainting the wall or ceiling to match the surrounding surface. This will help the repair blend in seamlessly with the rest of the drywall.
When to Call a Professional
While fixing a nail pop is a relatively simple process, repeated or large-scale nail pops may indicate a more serious issue, such as improper drywall installation or significant shifting of the home's structure. In these cases, it’s best to consult a professional drywall contractor, like Windsor Drywallers, to assess the situation and provide a lasting solution.
Professionals can also ensure that your drywall installation is done properly, preventing future issues like nail pops from occurring in the first place. With the right tools and expertise, they can offer a high-quality finish that lasts for years to come.
Conclusion
Nail pops are a common drywall issue, but they don’t have to ruin the look of your walls or ceilings. By taking preventive steps during installation and addressing pops as soon as they appear, you can keep your drywall looking smooth and well-maintained.
If you’re dealing with persistent nail pops or are planning a new drywall installation, the team at Windsor Drywallers is here to help with expert solutions and high-quality craftsmanship.
You might also like


